Notion Project History Management: Connect Planning Changes to Deployment
Learn how to manage Notion requirements, decisions, and checklist changes alongside design, code, and deployment activity in one project history.
Product
Project history management is more than keeping the latest specification. It means preserving how a requirement changed, why the decision was made, and how design, development, and deployment followed. With Notion as the home for decisions and documentation, Snapside can turn changes to selected pages into a project timeline.
This guide explains how to structure project history in Notion, what Snapside records after integration, and the operating habits that make the history useful.
What is Notion project history management?
Notion project history management is the practice of tracking not only the final state of project documents, but also the flow of meaningful changes.
Suppose a free plan limit changes from three projects to two. If the document only contains the latest number, future teammates cannot tell why it changed. A useful project history answers:
What changed?
What were the before and after values?
Why was the change made?
Which design, code, and deployment work followed?
When did the change reach the product?
Notion is well suited to decisions and explanations. GitHub records code, Figma records design, and Vercel records deployments. Project history becomes much more useful when these records can be read on one timeline.
Why is the latest document not enough?
A finished document explains the current state, but it does not automatically explain how the team arrived there.
Imagine an issue appears after launch. The Notion specification contains a new payment policy, the repository has several commits, and the deployment system shows a new release. Each source contains facts, but answering these questions still takes time:
Did the policy change before or after the implementation?
Which design update belongs to the same piece of work?
What decision was not reviewed before deployment?
Where should the team look first if it needs to roll back?
A durable history needs both a current document and a change timeline. The document shows the agreement today; the timeline shows the path that produced it.
Four records to create in Notion
1. Project home
Keep the goal, owner, schedule, and essential links in one page. It should provide direction at a glance instead of becoming a storage page for every detail.
2. Decision log
For each important decision, record the date, outcome, reason, alternatives considered, and affected feature. Even one or two sentences about the reason can save hours of reconstruction later.
3. Requirements and launch checklist
Manage user scenarios, acceptance criteria, edge cases, and launch tasks in a checkable format. Additions and completions naturally become signals of project progress.
4. Weekly review
Summarize changed decisions, completed work, and remaining risks. Rather than writing from a blank page, review the timeline and select the changes that matter.
What does Snapside record after connecting Notion?
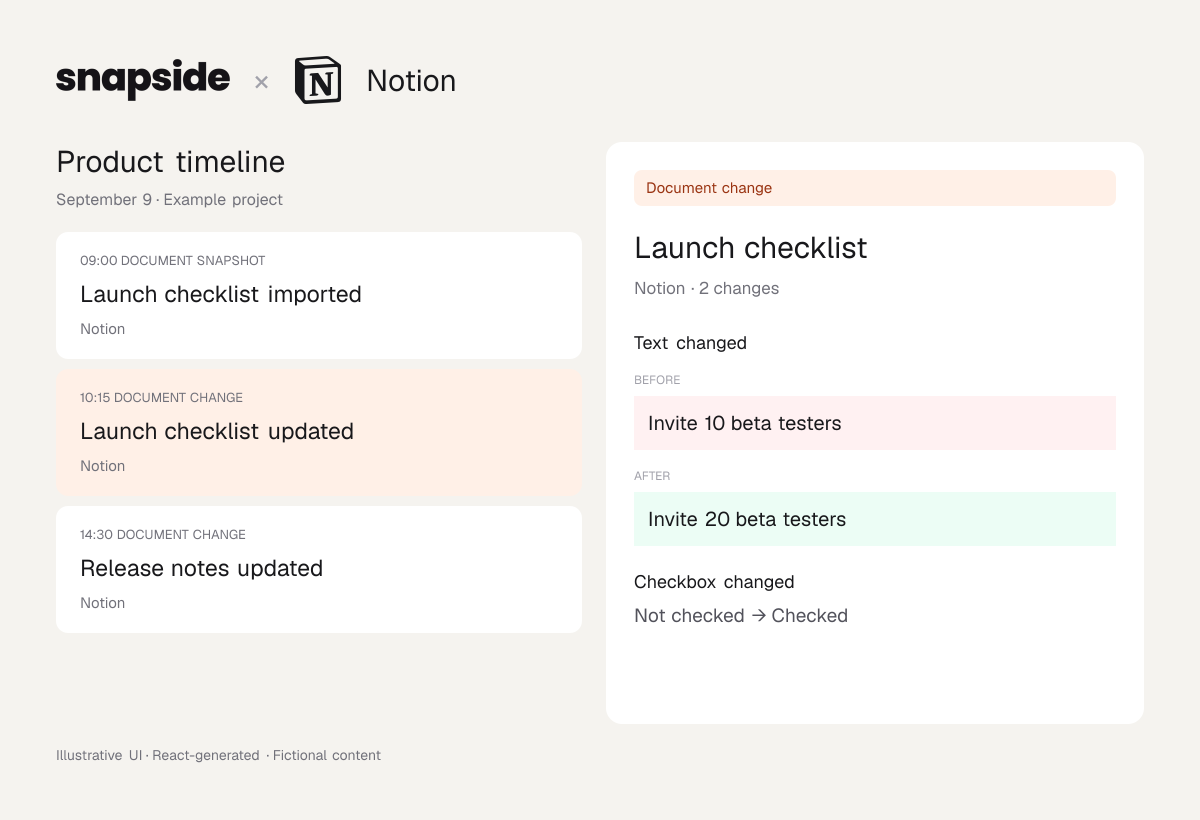
After you connect Notion and select the pages to track, Snapside first saves their accessible current state as a document snapshot. This is the baseline for future comparisons.
When a connected page changes, a later collection compares the previous and current states and records a document change. Depending on the available data and permissions, the comparison can include text, checkboxes, page properties, and added or removed blocks.
Example of Notion changes recorded in the Snapside timeline, including an initial document snapshot and before-and-after values. This is an illustrative interface recreated for the article.
Open an item in the timeline to inspect the captured before-and-after details. GitHub commits, Figma design changes, and deployments from the same period can provide the broader project context.
Records close in time are not automatically causal. For an important decision, write the reason in Notion or add a note to the Snapside record so the relationship remains clear.
A practical project workflow
Suppose the team decides to make the phone number optional on the sign-up form.
Change the requirement in Notion from required to optional.
Add the reason—reducing sign-up abandonment—to the decision log.
Update the form and helper text in Figma.
Change validation in GitHub and merge the pull request.
Deploy the new version through Vercel.
Each tool keeps its own record, but the connection between those records becomes harder to see over time. A Snapside timeline places document, design, code, and deployment changes in the same period, giving retrospectives, handoffs, and incident investigations a clear starting point.
In Notion, select the pages Snapside may access and approve the permission.
Confirm the connected page list in the integration management screen.
After the first document snapshot appears, edit one short test sentence.
Check the Notion document change and its details in the timeline after collection completes.
You do not need to connect the entire workspace. Start with frequently used pages such as the project home, active requirements, and decision log.
Operating rules for a useful history
Separate decisions from current state. Keep the agreed requirement in the specification and the reason for a change in the decision log.
Do not create a meeting note for every small edit. Let routine edits be collected automatically. Explicitly document decisions that change scope, cost, risk, or behavior.
Make titles understandable without opening the page. Include the subject and date instead of generic labels such as “Update.”
Review the timeline once a week. Check missing connections and unclear decisions, then add brief context to the records that matter.
Use the least access necessary. Connect only the pages required for project history and review the selected-page list regularly.
Frequently asked questions
Does Snapside import every Notion change from before the connection?
No. The accessible current state becomes the initial snapshot. Snapside does not reconstruct every editing version that existed before the connection.
How is this different from Notion page history?
Notion page history is useful for viewing and restoring an earlier state of one page. Snapside focuses on reading changes across connected pages together with code, design, and deployment activity at the project level. Use Notion’s official restore and page history features when you need to restore content.
Do Notion changes appear immediately?
Not always. Delivery of change notifications and content collection can take time, and multiple rapid edits may appear as one before-and-after comparison.
Does connecting a page publish it to the internet?
No. Connecting Notion and publishing a blog post are separate actions. Integration alone does not make the selected pages public. Still, select only the necessary pages and review permissions regularly.
Should every Notion page be connected?
No. Start with active, high-value project pages. Connecting old or rarely changing documents can add noise without improving the history.
Preserve the process, not only the result
A good project document explains the current state. A good project history also explains why that state exists.
Connect one specification you expect to edit this week. After a few days, you will be able to review not only the finished document, but also the sequence connecting decisions to execution.
 snapside